Using the Object Library and Make Your Own Objects
All about Concepts’ object libraries and how to make your own vector objects.
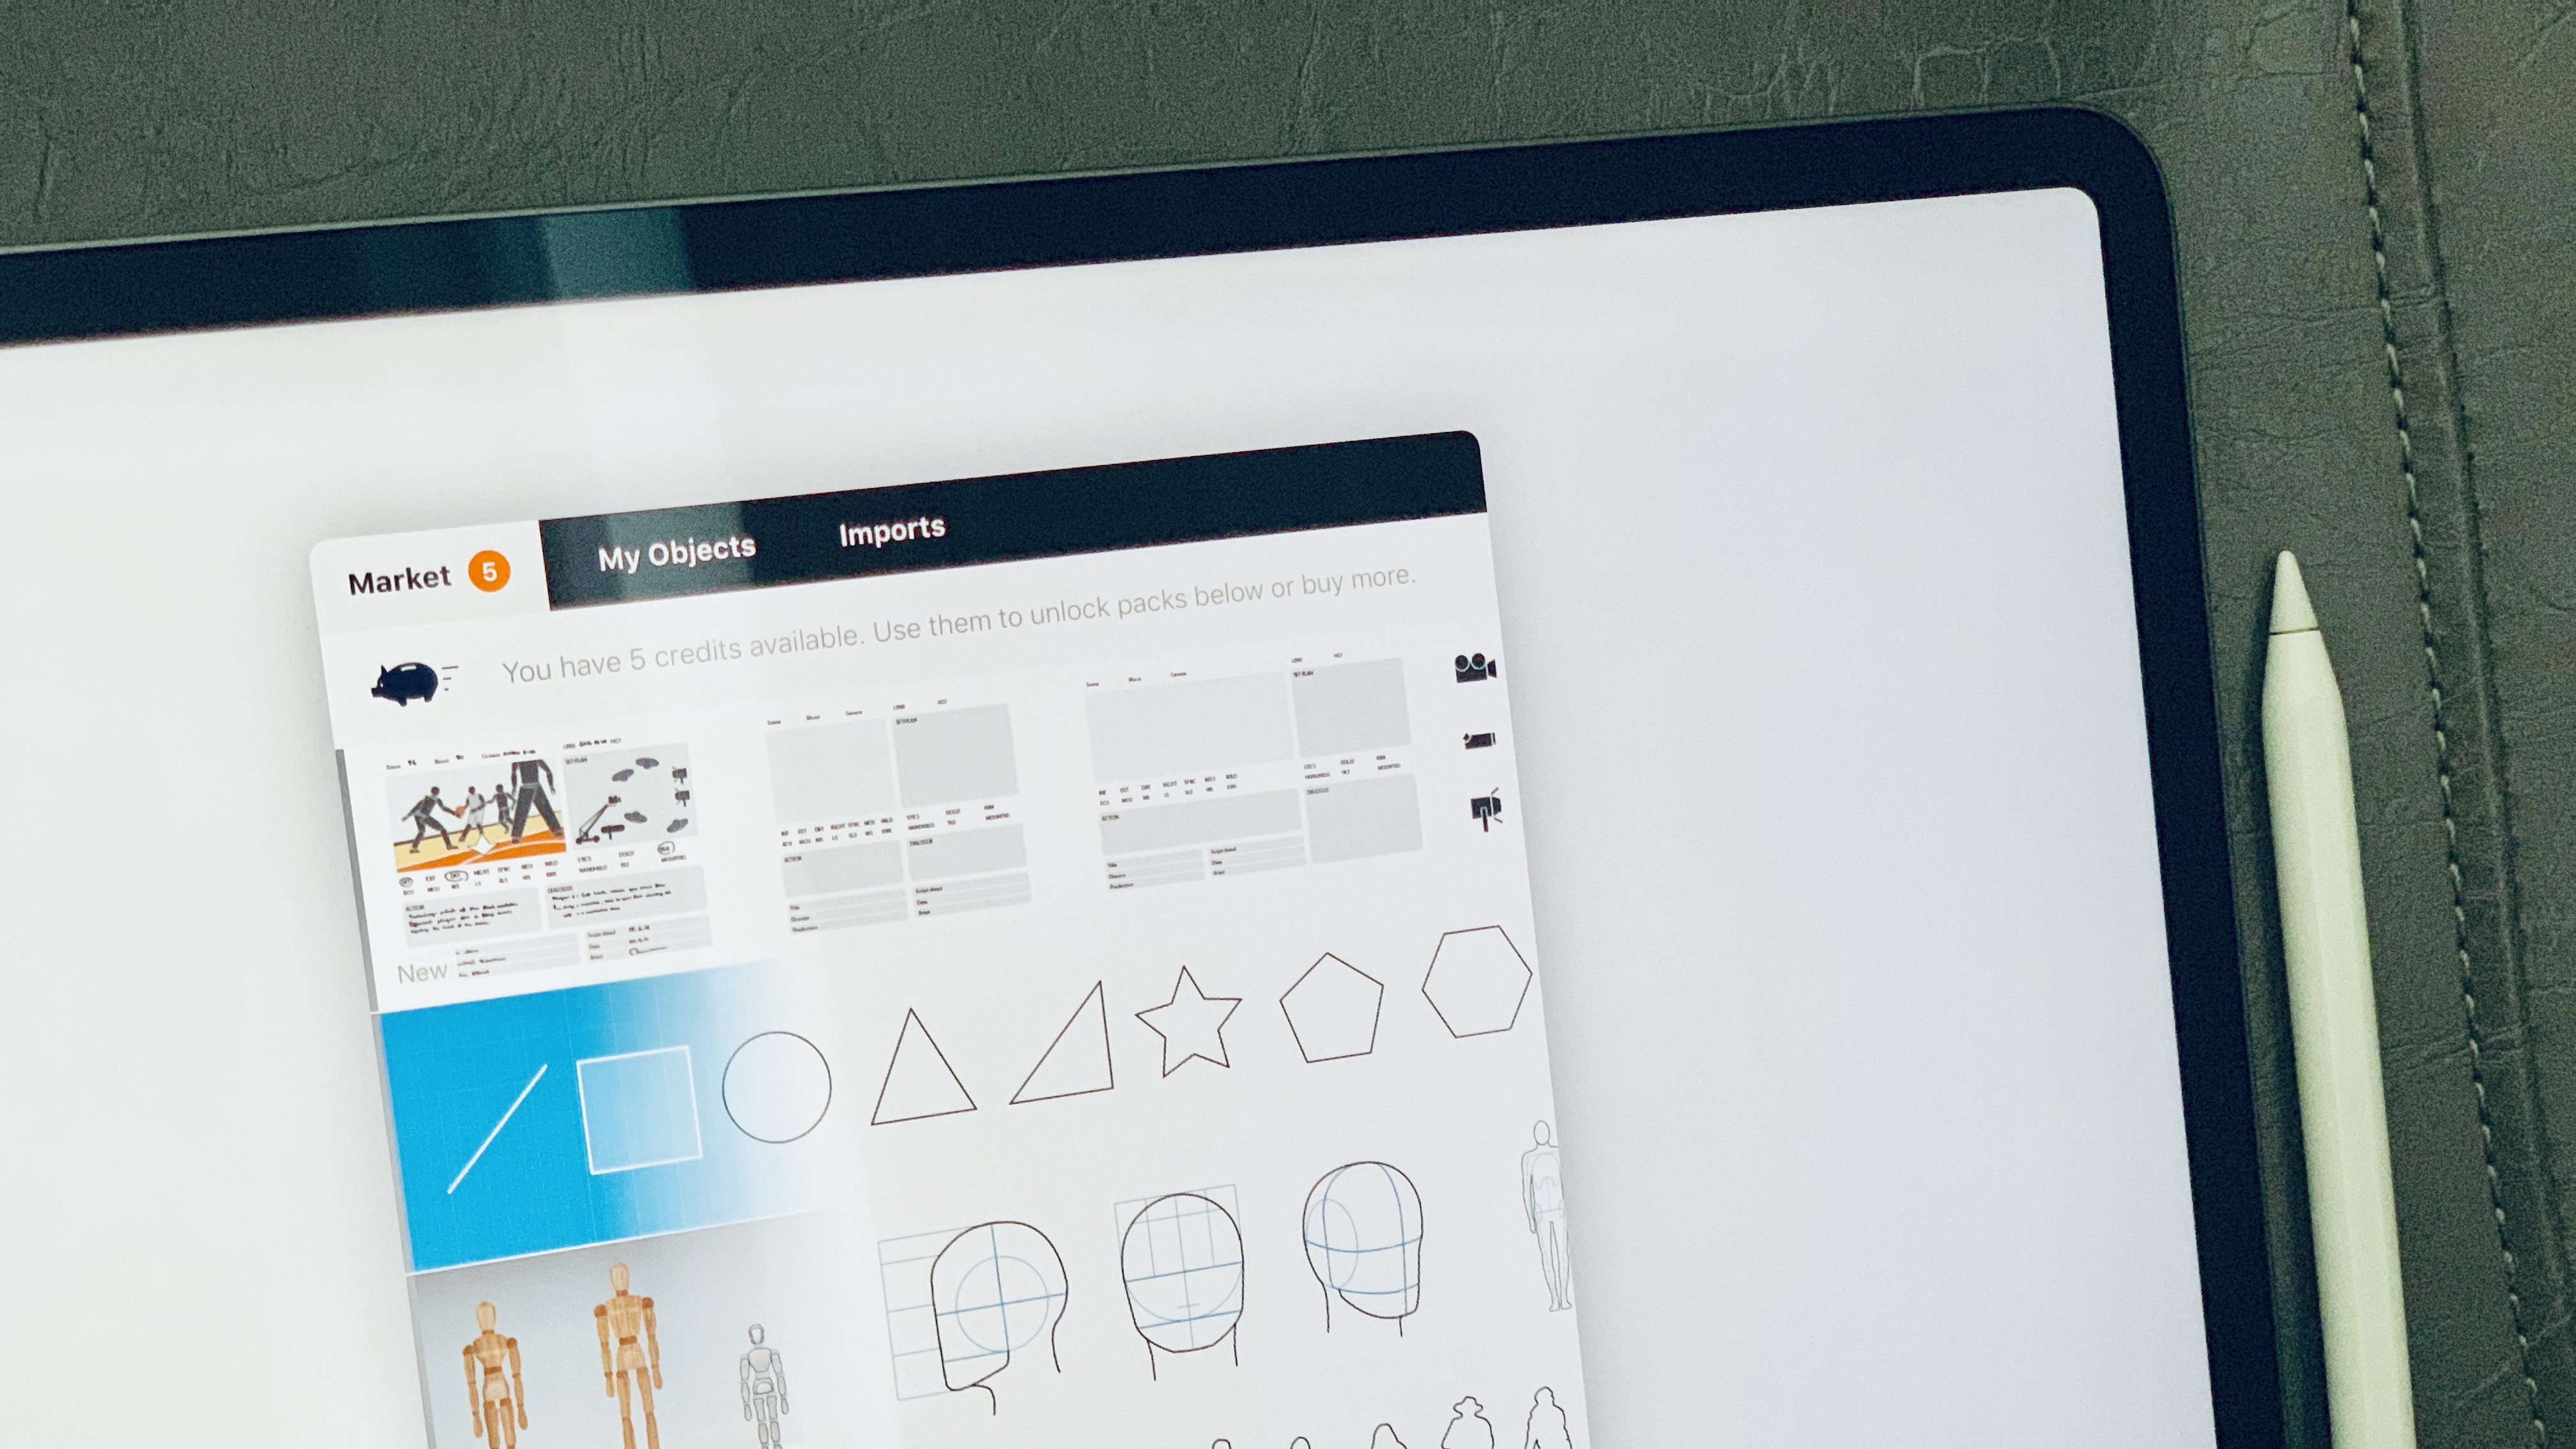
With creativity and its corresponding deadlines more in demand than ever, smart tools can help you create faster, so you can, you know, create faster.
Adjustable vector-based objects that provide fast frameworks definitely fit the “smart tools” category. The objects in Concepts are pre-made, royalty free, and fully adjustable to meet your current project’s needs. All you have to do is tap or drag them onto your canvas, edit them if you’d like, and draw from there.
You also have the ability to create personal object libraries with Make Your Own Objects (MYOO). With just a little prep, you can deliver on-site presentations, sketchnotes, interior and architectural plans, even landscape designs simply and quickly with your own style.
Here is how you can use, edit, create and share objects in Concepts. And if you’re feeling expressive, every object is iMessage compatible. This means anything you draw, you can turn into a sticker. More on that below, too.
Object Library Basics
Open Concepts and enter a drawing. Find the Import button on the canvas. Tap it once and it will unfurl an object library along the edge of your screen. Tap it again and it will hide the library.

The Basic Shapes library has 22 shape objects. It’s included with Essentials and Subscription.
You might not see any objects in your library yet, just a paperclip (an alternate way to attach selections to the clipboard) and the word “More”. Tap More and you’ll be brought to the full Import menu.
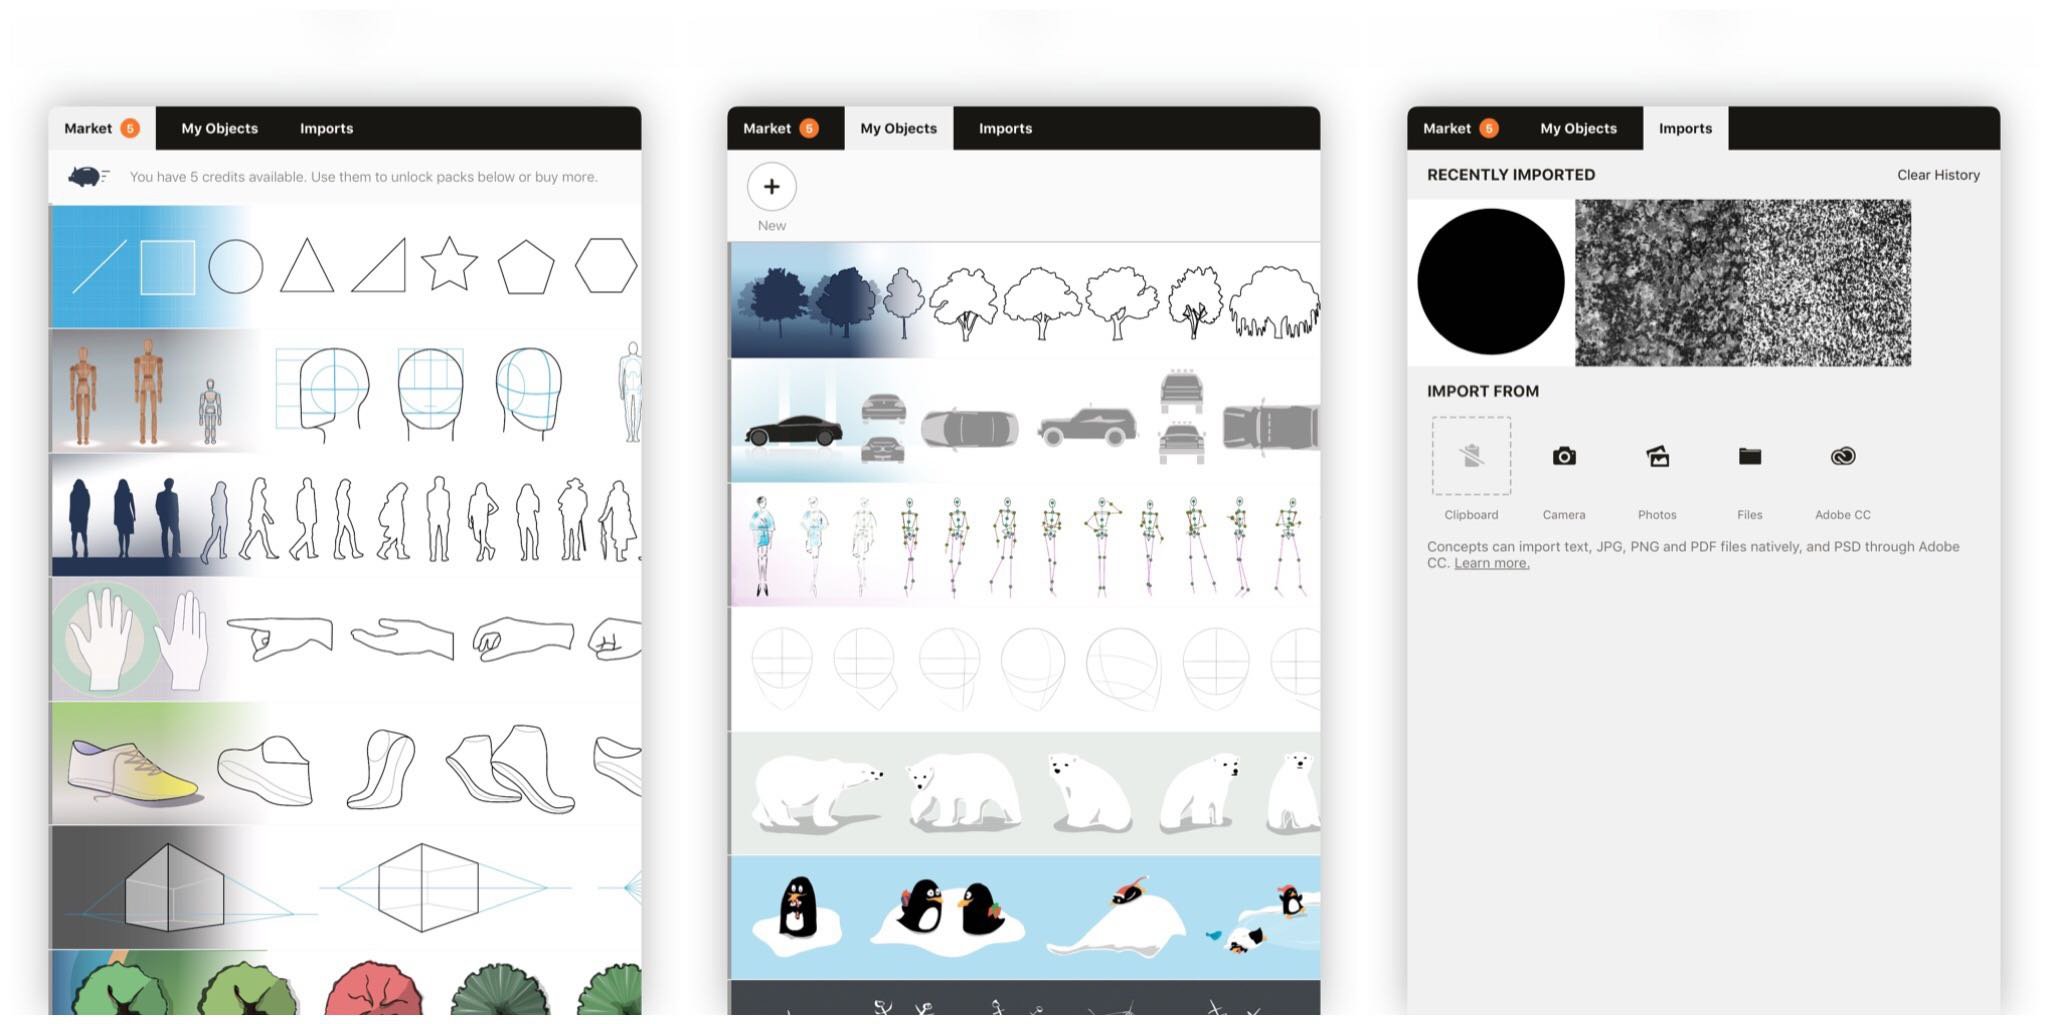
The three tabs in the Import menu.
In the Import menu, you’ll see three tabs at the top: Market, My Objects and Imports.
Market. In the Market, you can find packs of pre-made, royalty-free, editable objects— everything from basic shapes to mannequins, perspective grids and UI kits. Helpful-type stuff you can unlock with credits (buy in bulk, trade in on your own time) or a subscription (unlocks everything). The basic shapes library comes free with Essentials.
My Objects. In My Objects, you’ll see all of the objects you own. This includes purchased packs and libraries you create. You can tap+hold+drag these libraries to reorganize them, and scroll through horizontally to explore what’s inside.
Imports. The Imports tab is where you can access your photos and files. As a shortcut to this tab (avoiding the objects), just double-tap the Import button on the canvas.
Once you find an object library you like, tap it to access it from the canvas.
From here, you can tap or drag any object onto the screen. It will appear selected for you so that you can adjust its position, color, size, scale etc. before setting it into place.
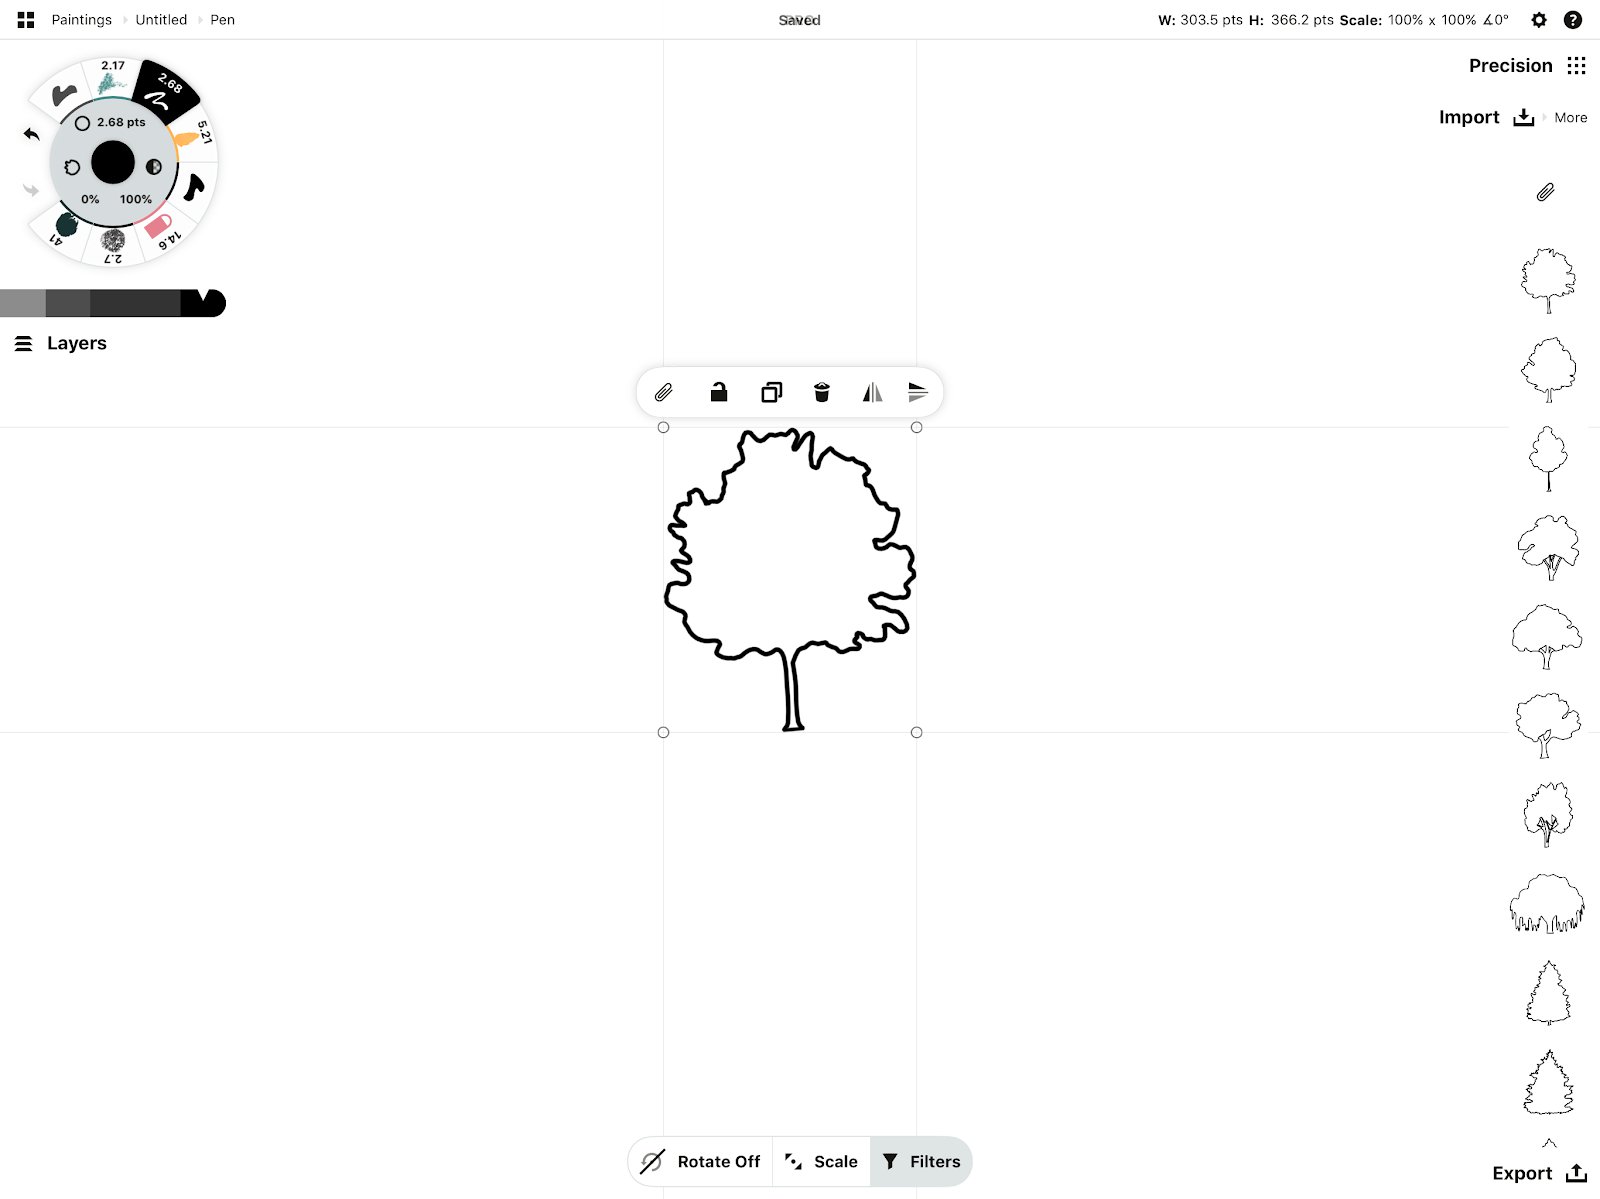
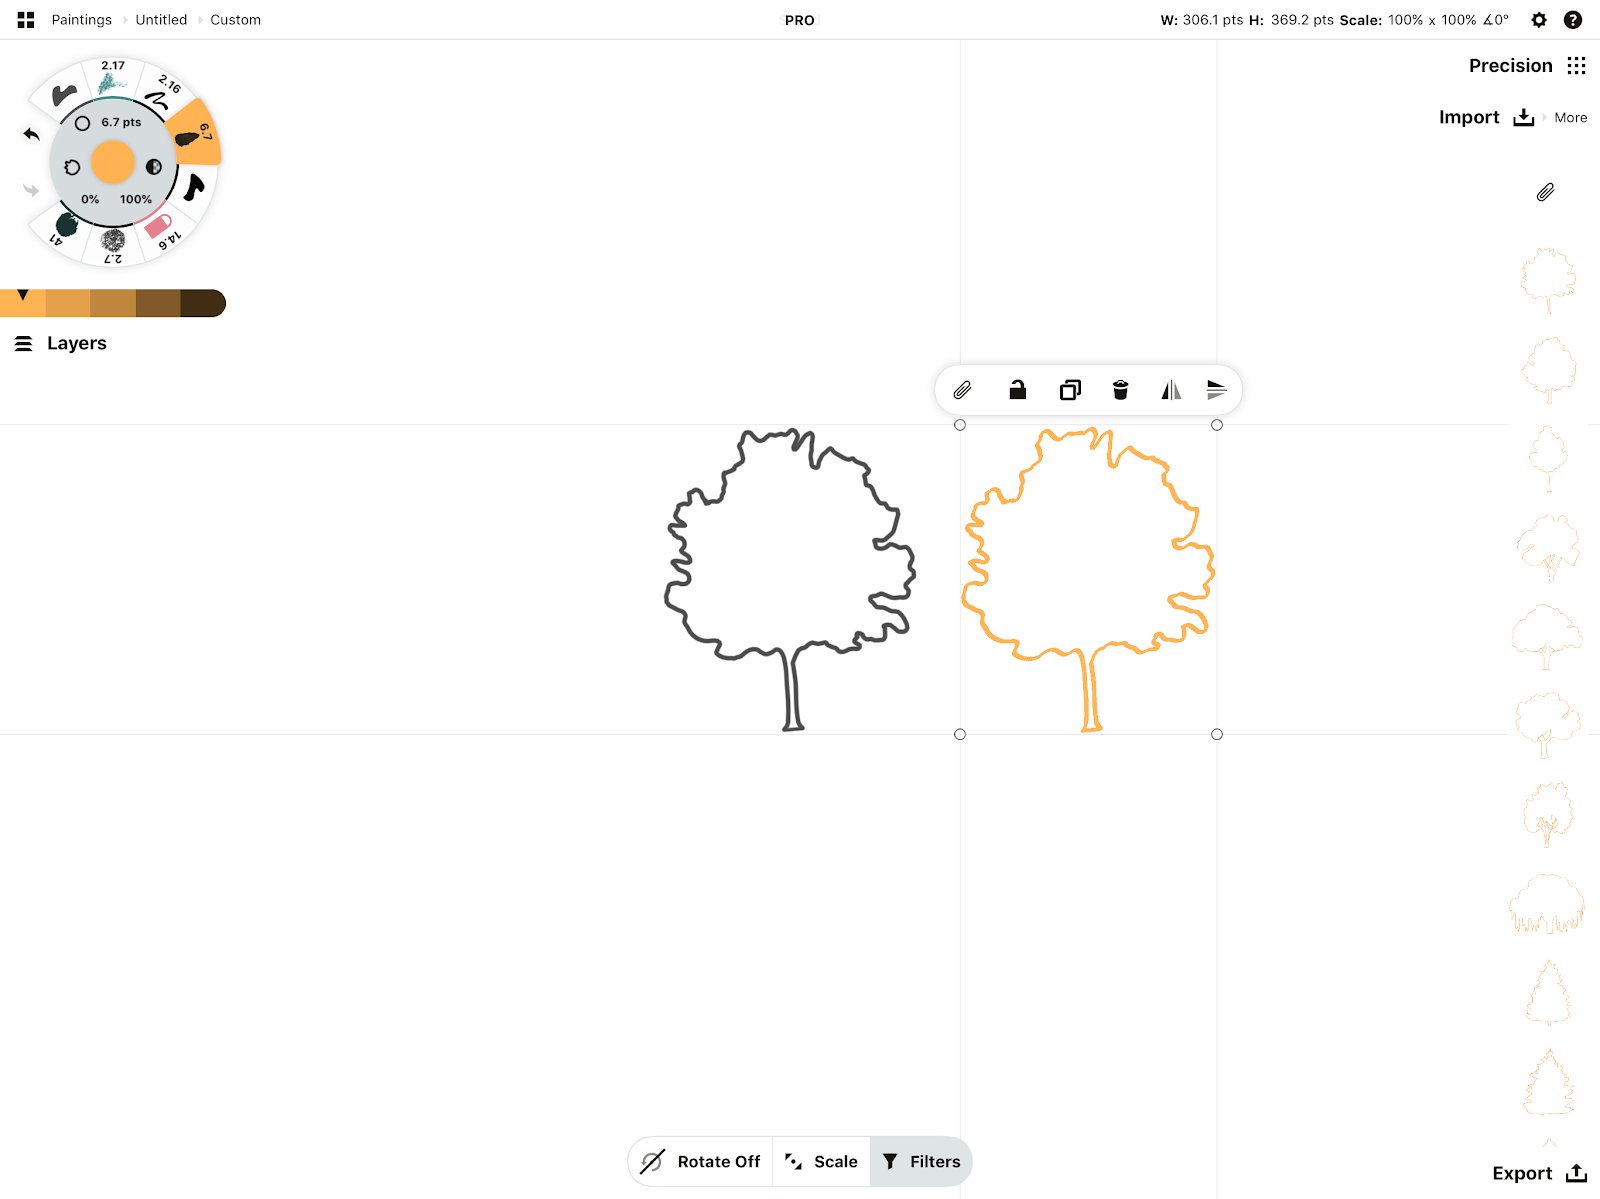
Many object packs will change appearance in the library according to the tool you have active. Switch to a pen, for example, and the objects will change to pen. Make the pen orange and the objects will become orange.
To make filled objects, select the Filled Stroke tool.
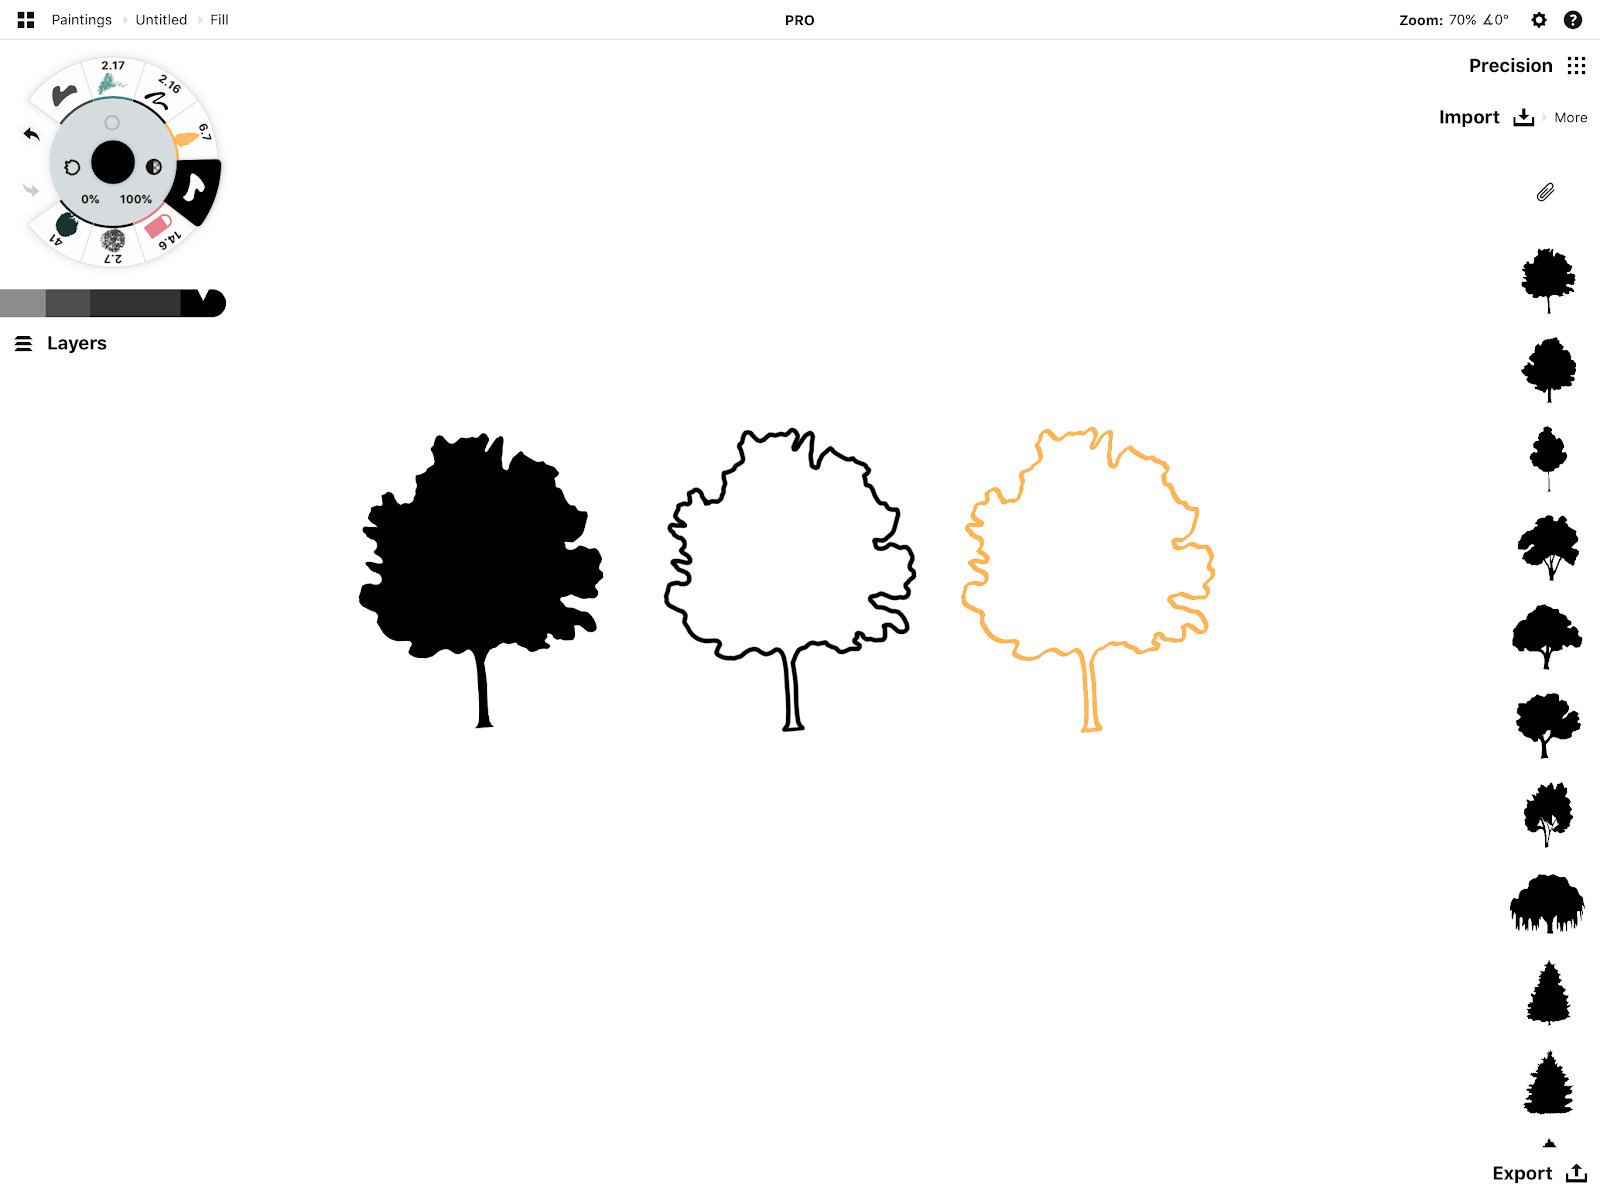
Tap the screen outside the bounding box to set your object in place. You can always select it again later.
More Useful Tricks for Working with Objects
To maintain the proportions of your object as you resize it, make sure Scale is on in the selection popup (instead of Stretch).
It helps to have Rotate “Off” if you want your object to stay vertical.
To rotate your object an exact number of degrees, make sure it's selected, then tap+hold the angle value up in the status bar. Choose from the shortcuts or enter your own value.
If the object is made of several strokes or layers, grouping them together into one object makes selecting and manipulating it much easier. Tap the chain link on the selection popup to group it, then select and move the object around as a single entity.
Make Your Own Objects
To create your own objects, you need to purchase Make Your Own Objects (MYOO) from the Market or subscribe to the app. This gives you the ability to make unlimited numbers of libraries with as many objects in each as you want.
Anything you draw, select and add to the library is considered an object.
Once you’ve unlocked MYOO, the big difference you’ll see in the My Objects tab is a plus at the top of the library. This is your key to new libraries.

Tap the plus. You’ll whisk back to the canvas to find an empty-looking library beside the Imports tab, complete with a clipboard and a plus sign.
To make a new object, all you need to do is select something you’ve drawn and tap the plus. Or you can drag it to the plus - the selection itself will snap back to its original place on the canvas afterward.
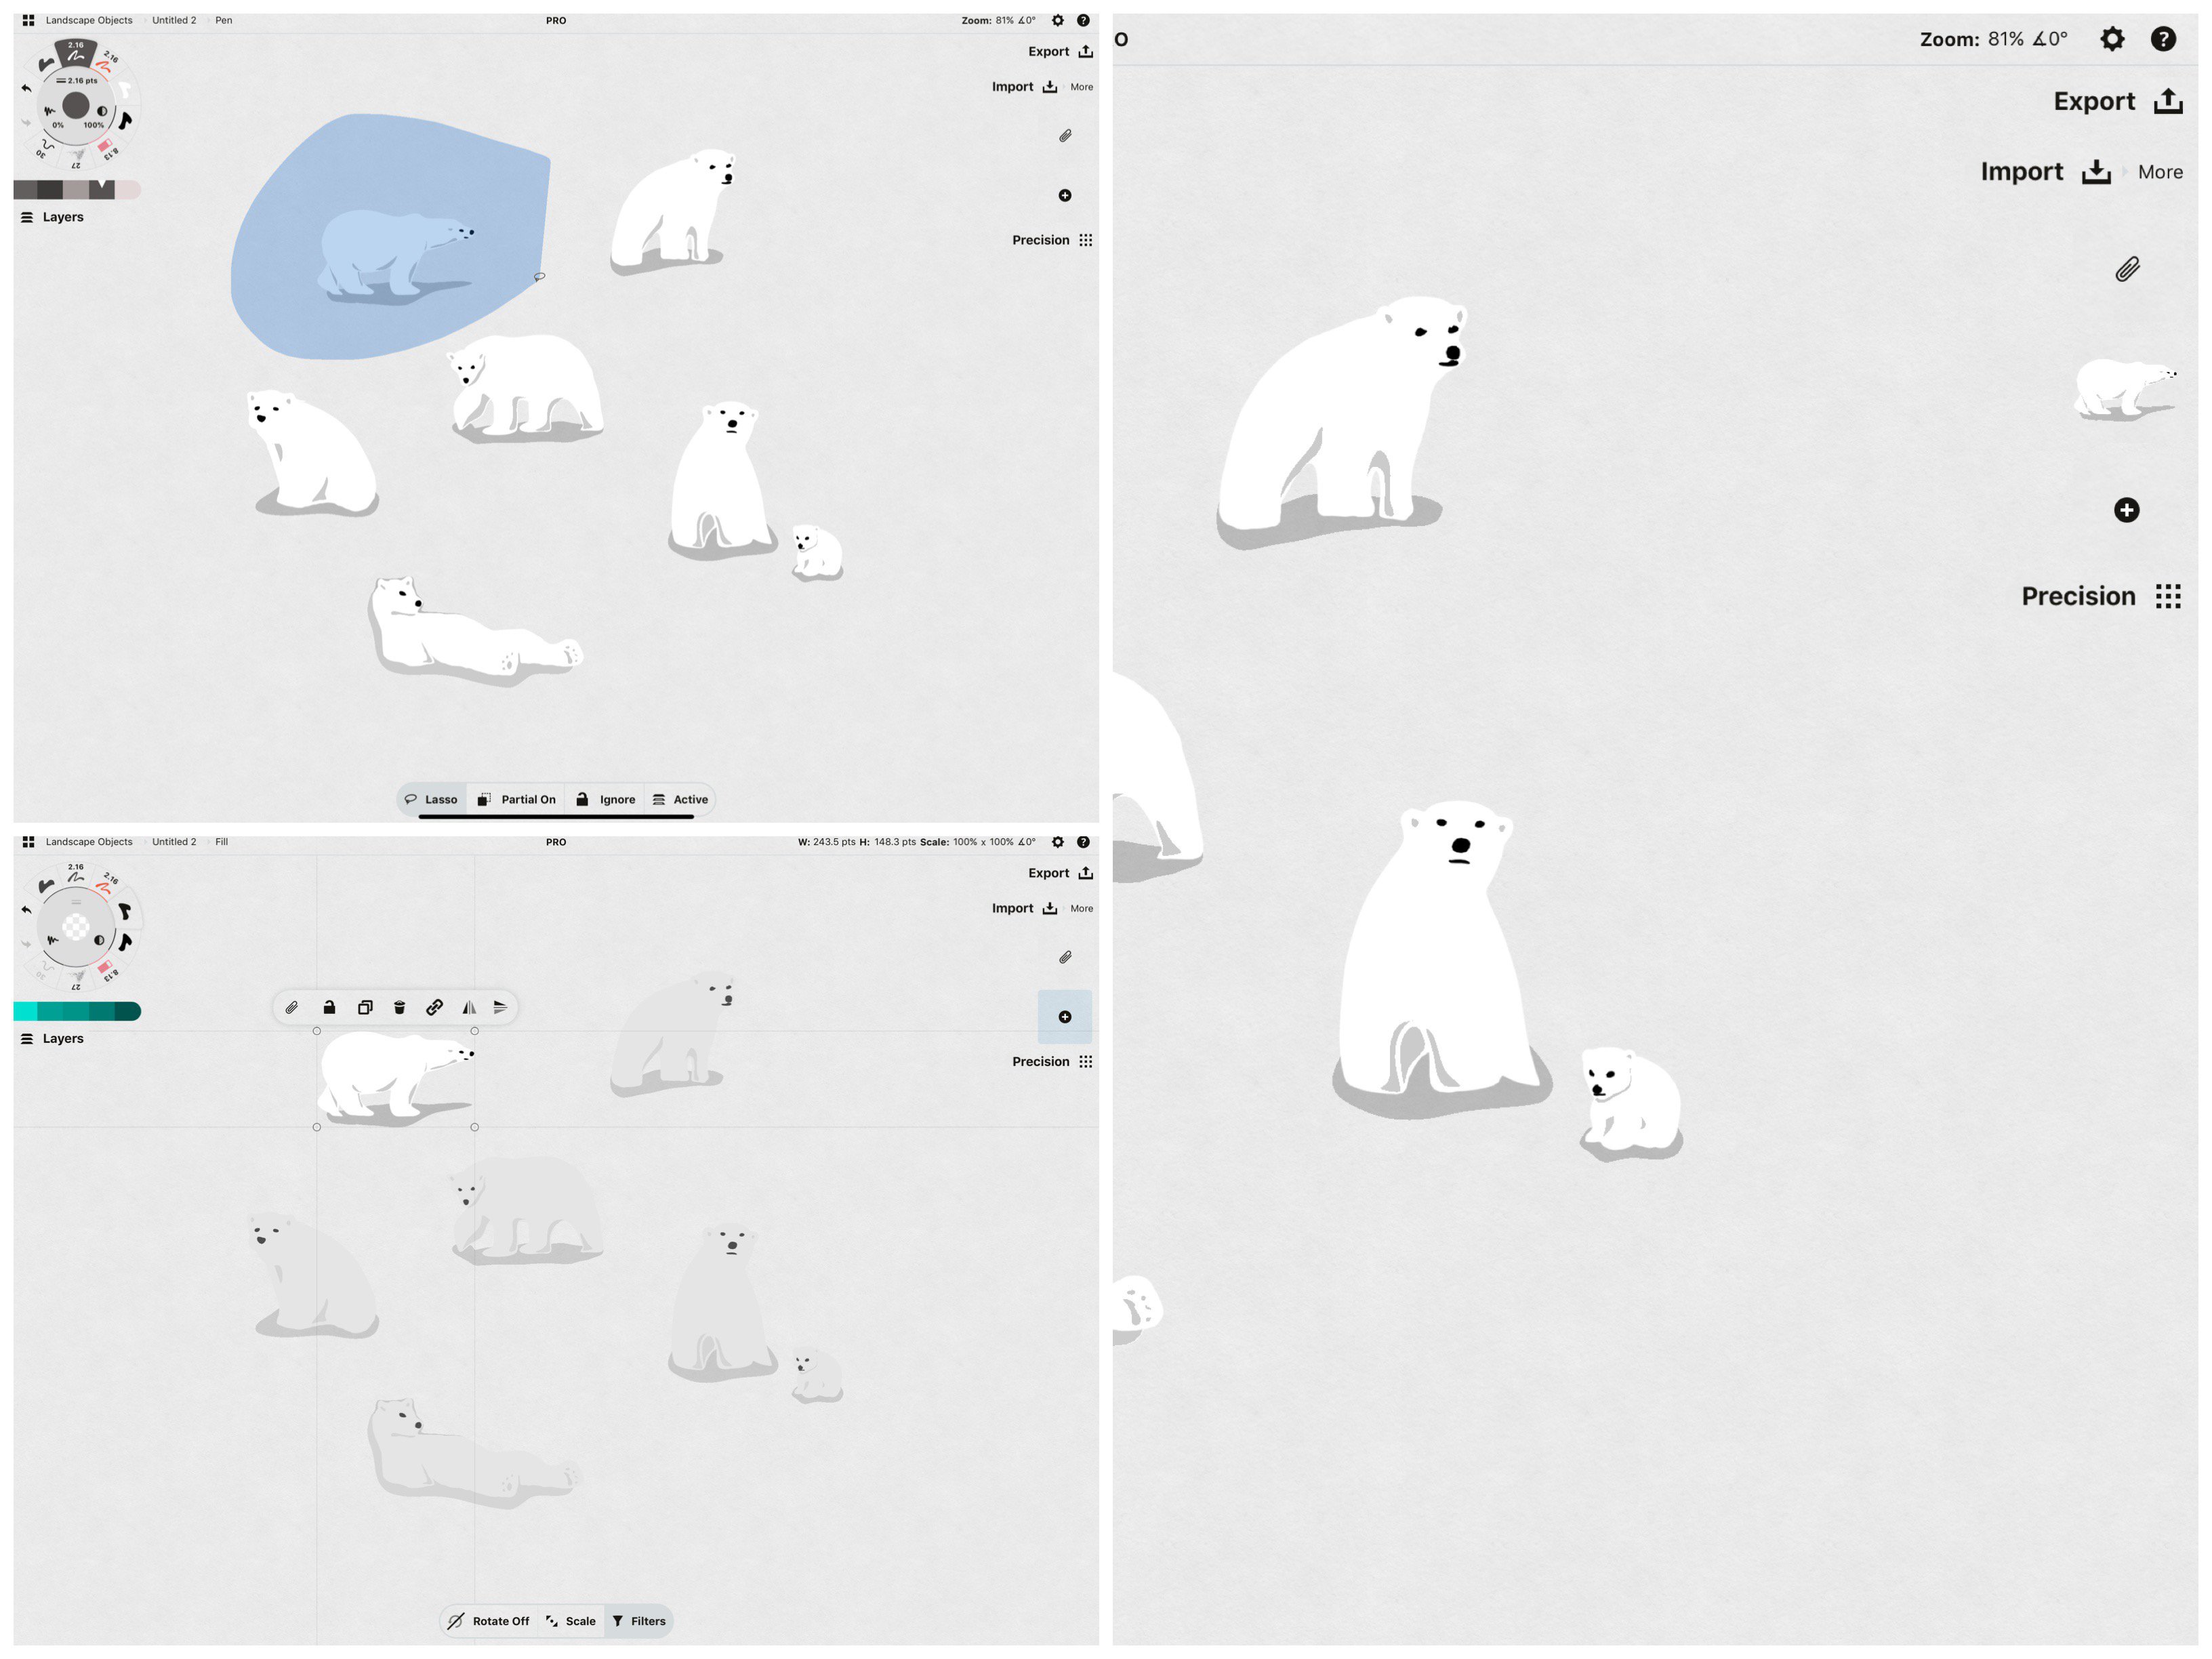
Select your object and tap the plus in the object library to make a new object.
Your selection is now an object.
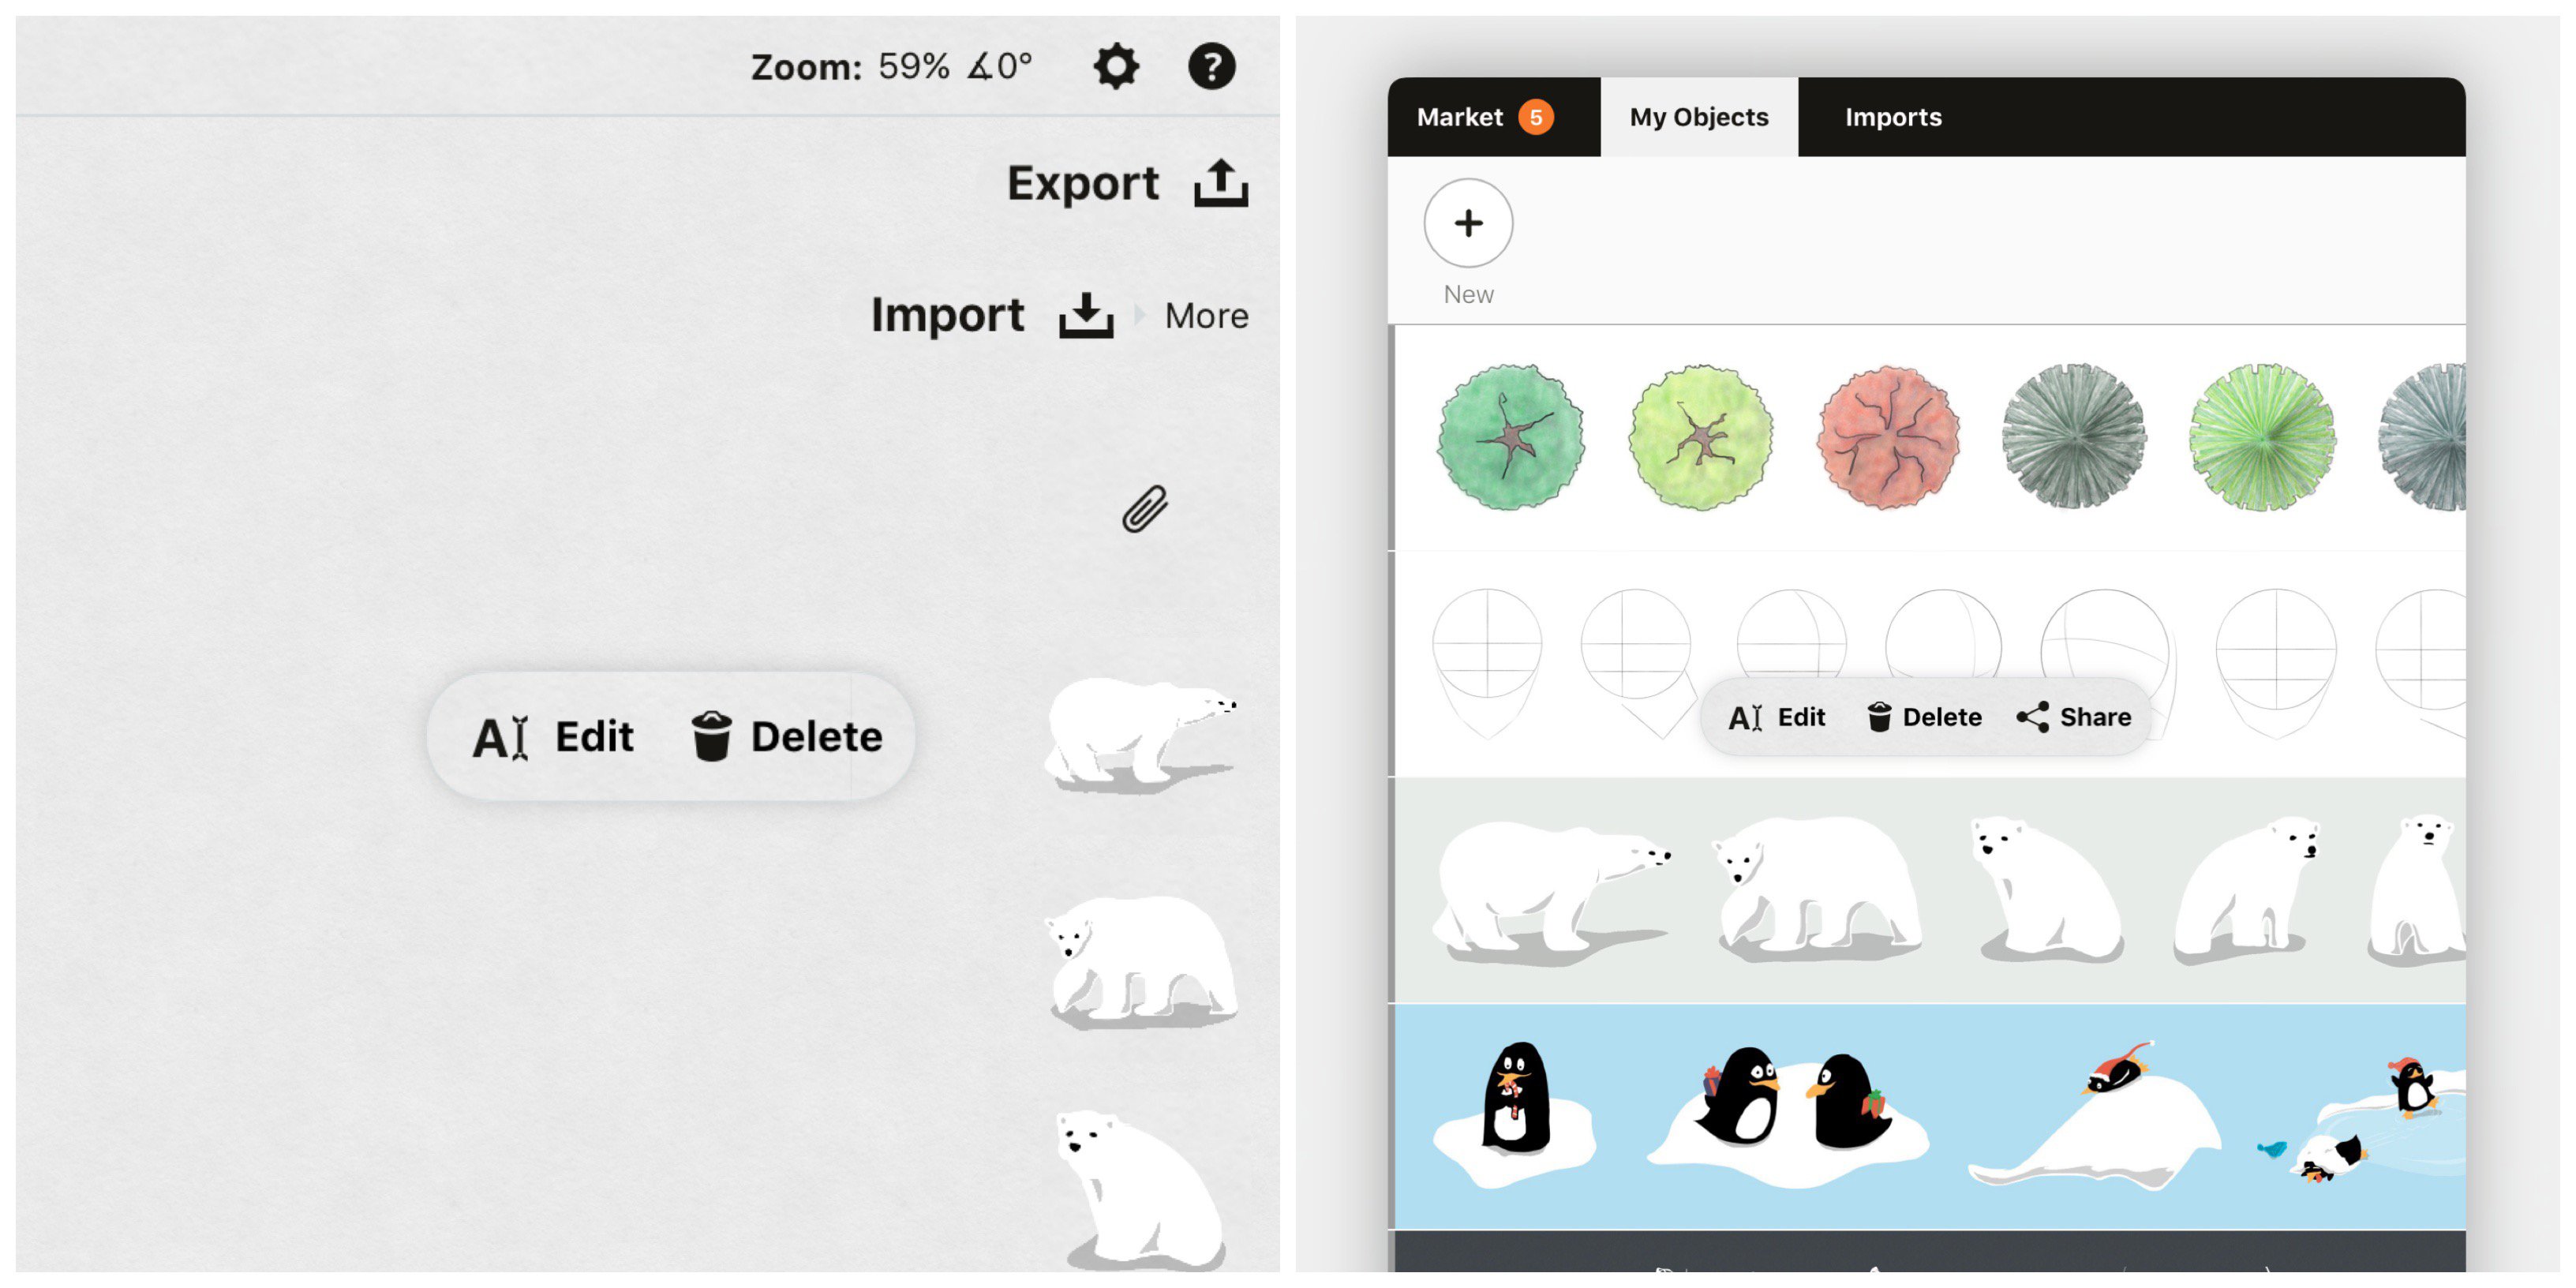
Tap+hold an object or library to edit it.
To delete or name your object, tap+hold on it in the library and tap your option in the popup that appears.
To delete, edit or share an object pack in the My Objects tab of the Import menu, do the same. Tapping Edit here will also present a menu with the abilities to assign your library a pack name, description and search tags, as well as apply certain properties.
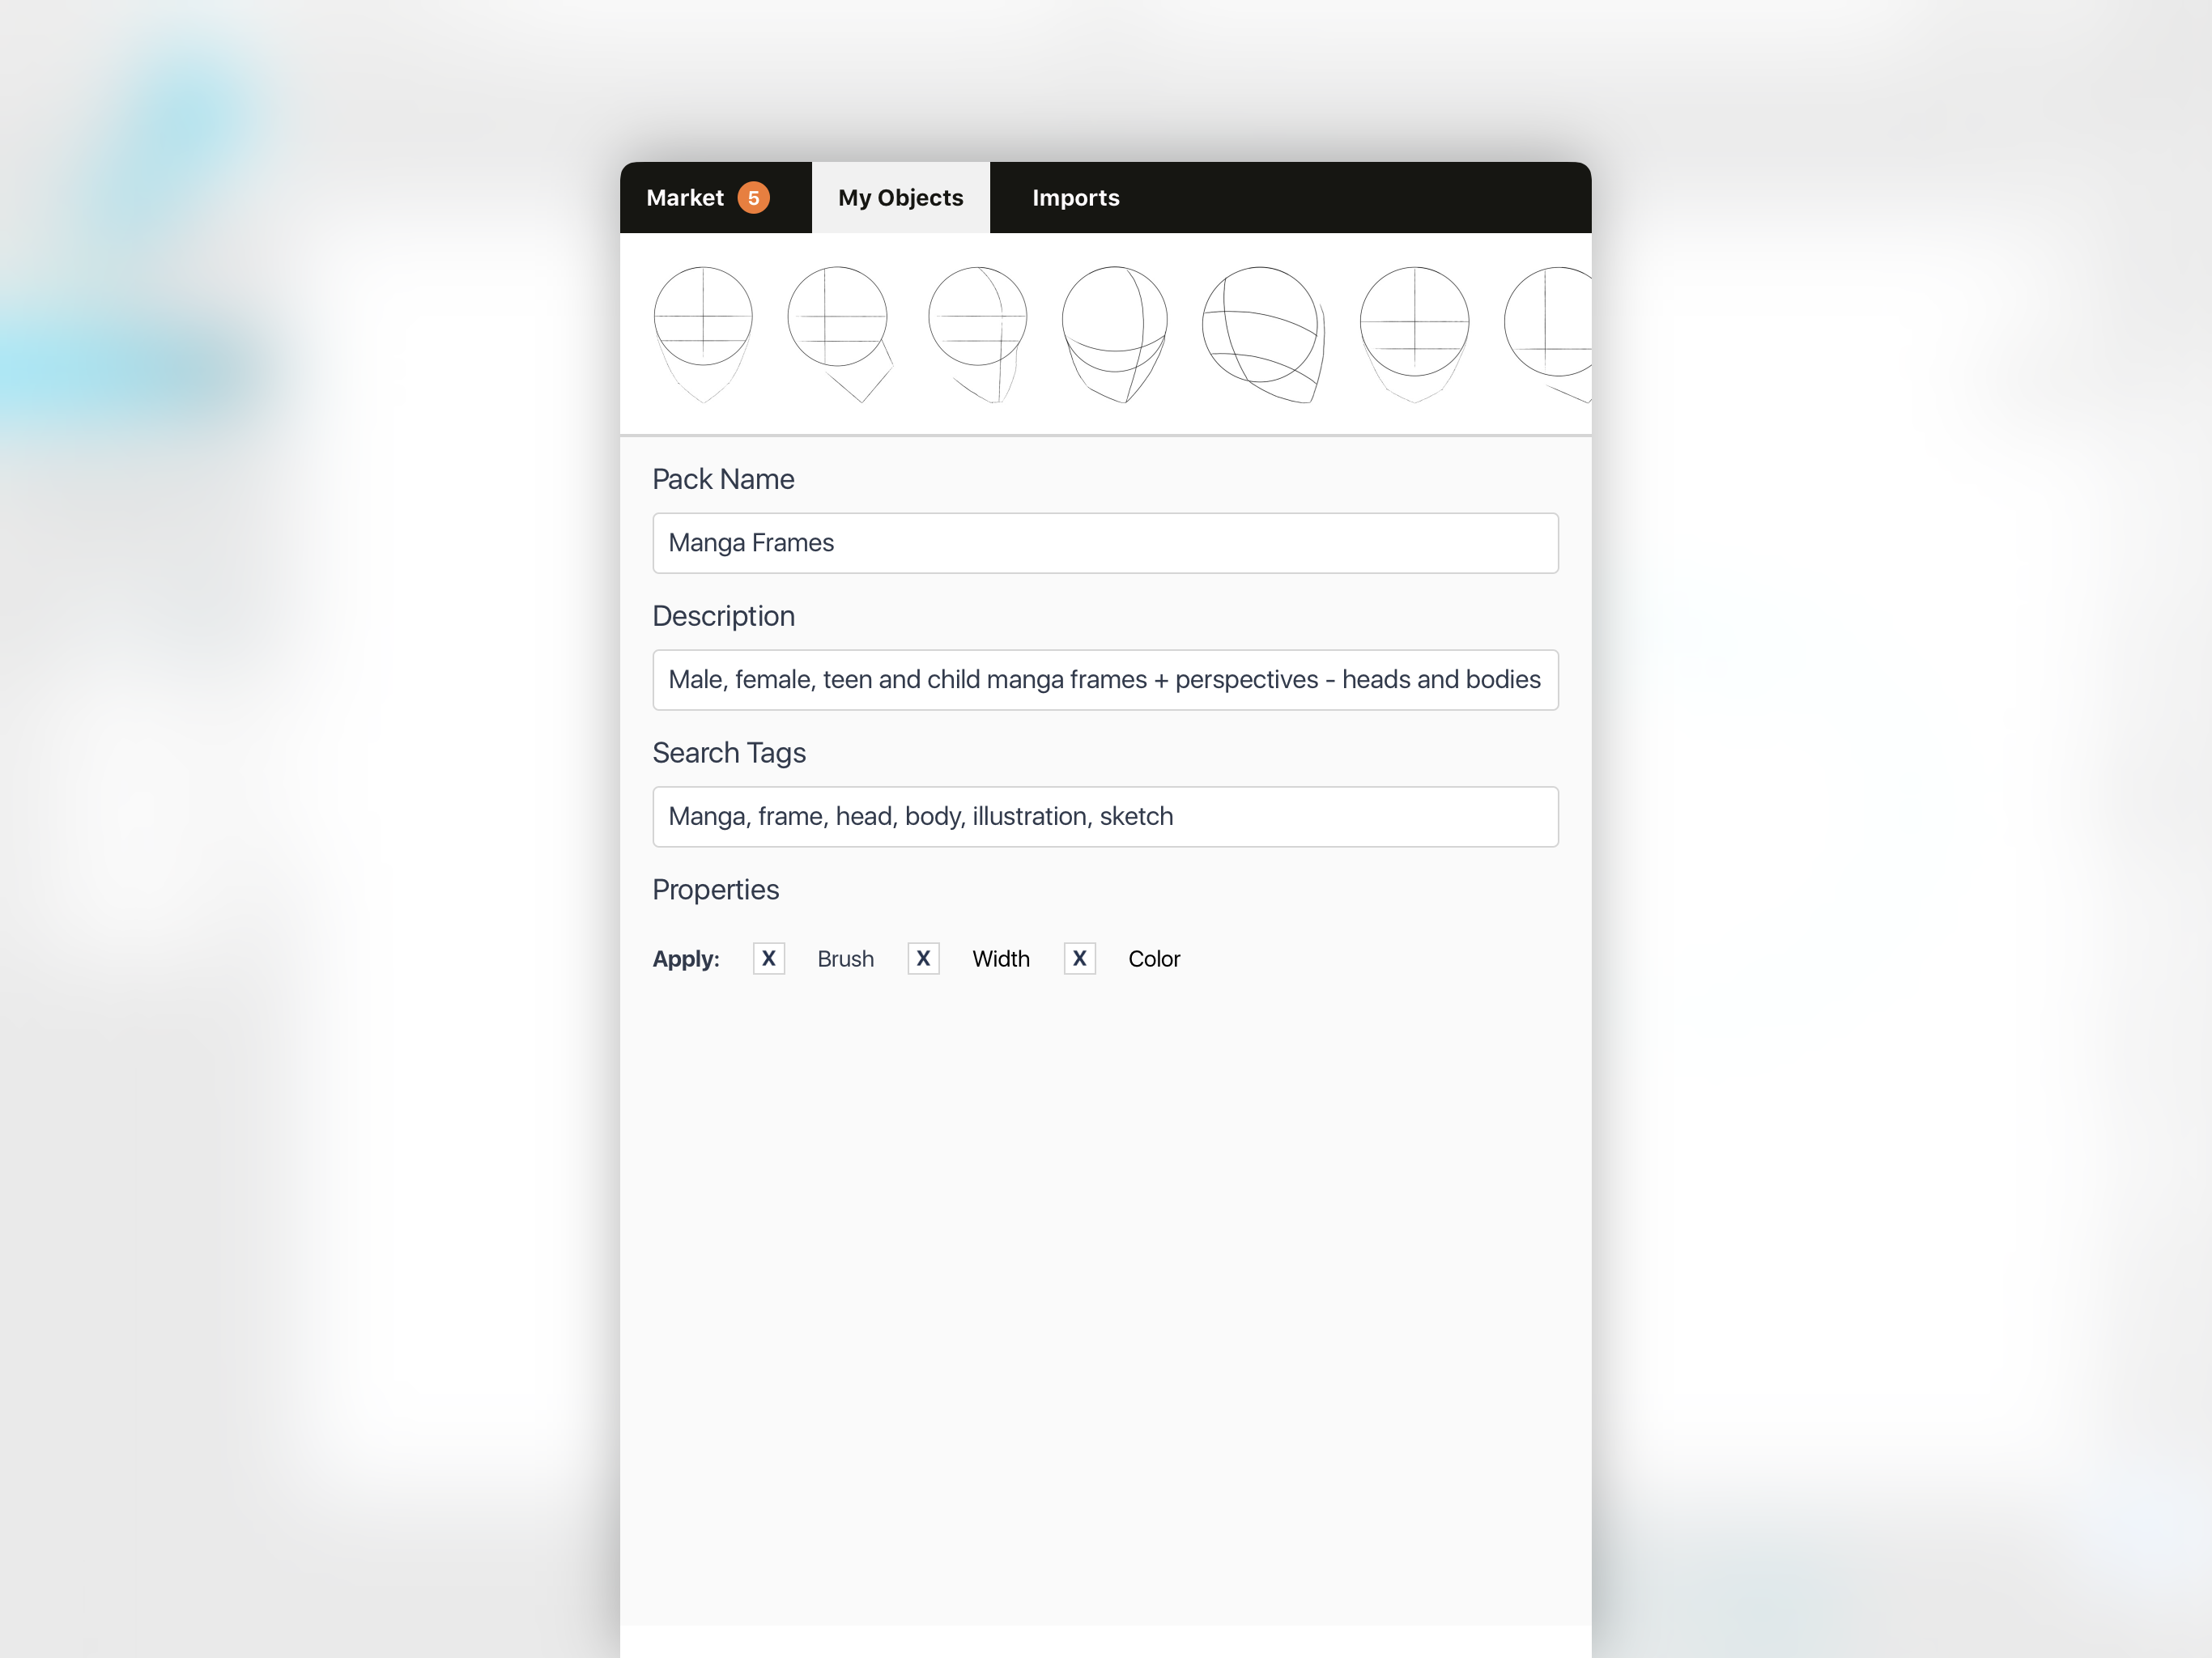
1. Tap+hold your object pack in the My Objects menu. 2. Tap Edit to bring up the pack's property menu.
Some packs like the Basic Shapes library let you change their brush, width or color properties based on the active tool. You can choose to apply one or all of these changable factors to your own library by checking the box beside each property in the menu. This works best with objects made with only one tool, as the filter for brush, size and color will be singular. If you want your objects to always appear as you created them, simply don't check the boxes.
That’s it. Add new packs and objects to the library to your heart’s content, whatever you can imagine. Tap or drag them onto your canvas and work fast in your own style.
Sharing Object Libraries
Subscribing unlocks Team Sharing for object packs, brushes and color palettes you have created in the app. Those you share with do not have to be subscribed, they can receive shared libraries as long as they have a free Concepts account.
To share an object pack, find the pack in Imports -> My Objects, and tap+hold the library. Touch Share. You’ll be given a link you can copy to your device clipboard and paste into emails, texts or documents. If you want to post a set of objects for sale on your Gumroad, for example, you can share the link with them after purchase through your store.

Any object pack you share will be editable only by you, including titles and object names, so be sure your pack is recognizable and labeled well. Whenever you make changes to the library, they will update live on all devices with whom the pack is shared. You can unshare object packs and friends can unsubscribe from shares at any time.
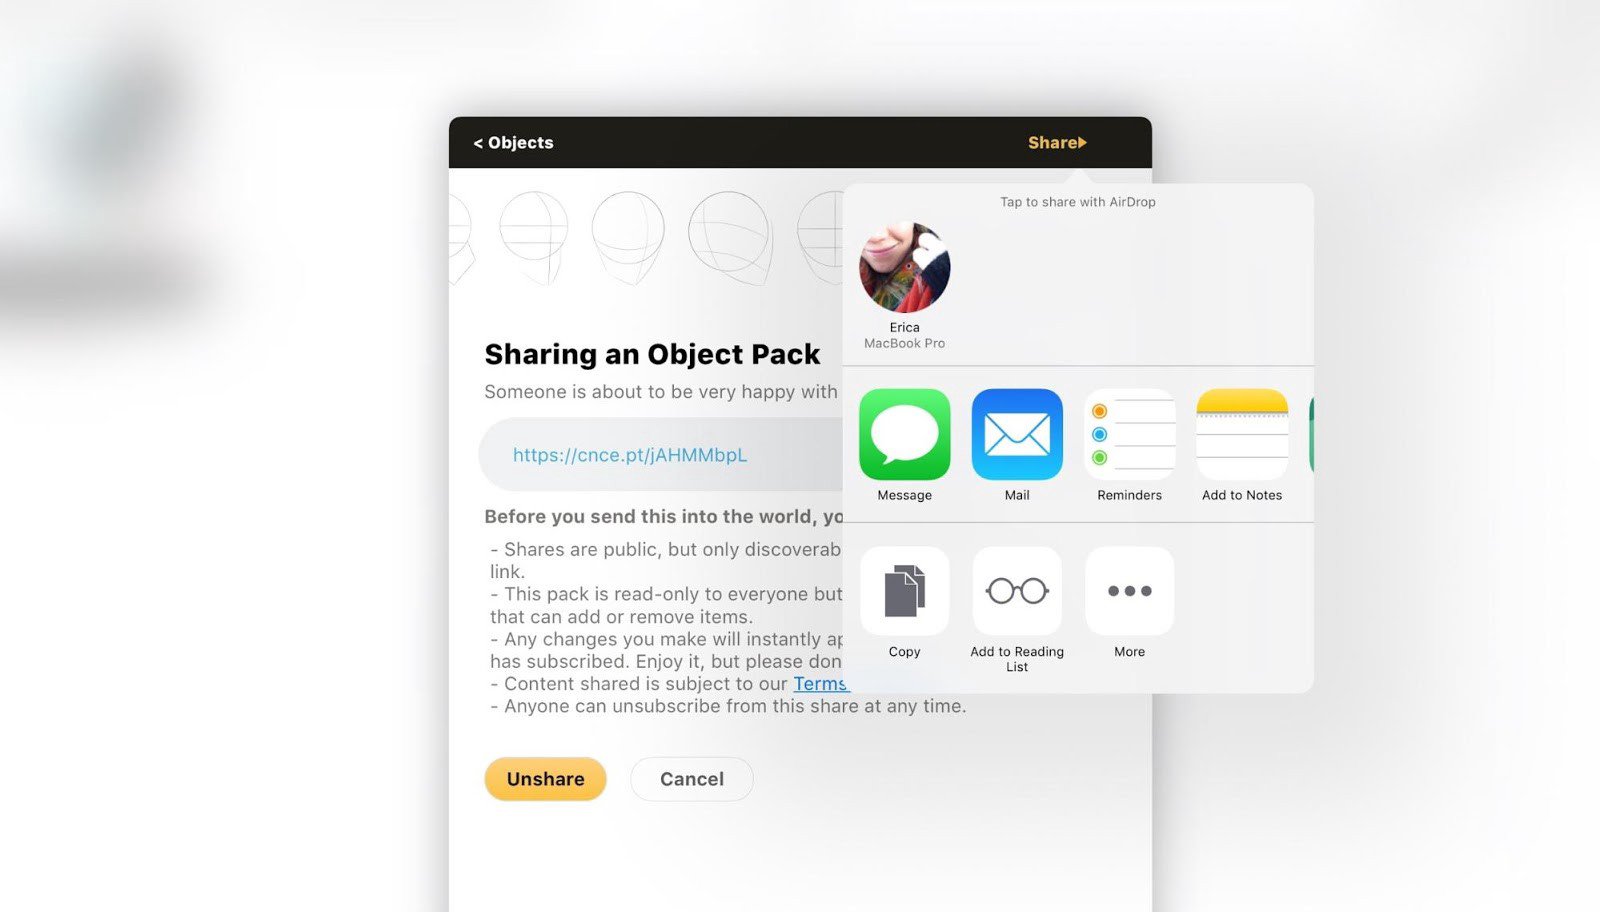
Select and copy the share link, or just choose where to send it.
Using Objects as iMessage Stickers
1. To use an object as an iMessage sticker, you need to allow iMessage access to Concepts. Apple has a quick how-to here.
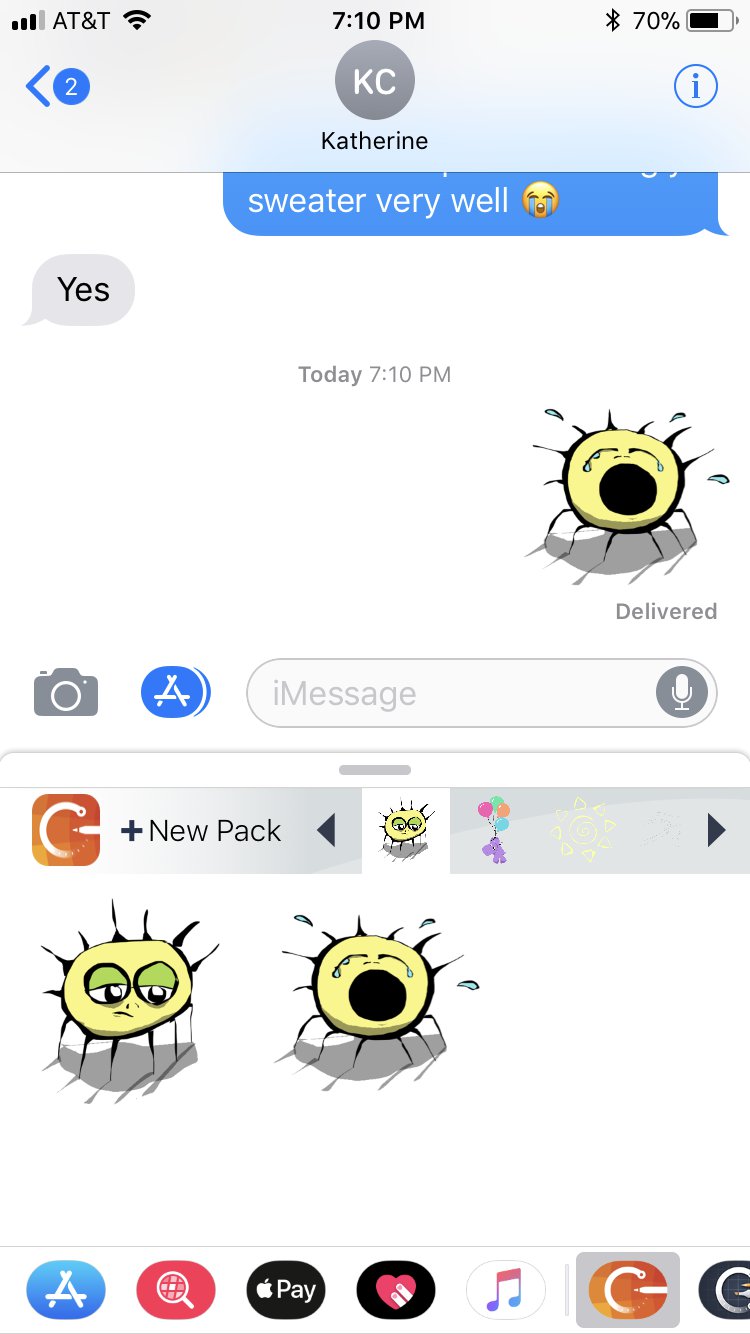
2. Once that’s set up, tap on the App Store icon in iMessage. You’ll see the Concepts icon on the bottom menu of app choices. Tap it and your object libraries will appear. Use the arrows to scroll through them in the upper menu. You’ll see the objects change in the viewer below.
3. Choose an object to express yourself and deliver it.
We hope you enjoy the flexibility and speed the object libraries offer. If you have any questions about using or creating objects, please email us at concepts@tophatch.com. We’ll be happy to help.
By Erica Christensen
Recommended
How to Make Icons - Concepts’ smoothing, slice and nudge tools make creating icons easy work. Learn how to make the icons we use in our own Concepts menus inside the app, and try your hand at making your own.
Select and Edit Your Notes, Drawings and Designs - Learn how to select and edit anything you draw in Concepts.
Sketchnoting Tools and Techniques - Graphic Recorder Tobey Busch shares tips for creating simple visual images and Sketchnotes.